Scriptaculous image slider/carousel for Blogger
Image galleries, sliders and slideshows are becoming more and more popular on websites and more and more developers are creating these powerful, versatile and elegant galleries. In this tutorial, you'll see how to display related content in an eye-catching and easy-to-use way by adding a beautiful slide carousel to display an image gallery with a cool scrolling effect.


Step 2: Click anywhere in the code area and press CTRL + F. A search box will open: type the tag below and press ENTER to find it:

Step 3. Just click add these scripts:
Step 4. Then find the following tag (see screenshot below for details):
Step 5. Right above this tag, add the following CSS:
Please note:
Check out the comments highlighted in green to see which parts you can customize, such as the border color and background color in the carousel. Note that shares are images, so if you want to change them, you'll need to replace the two blue URLs with your own images.
If you want to change the size of the container, change the /* container width */ (carousel width), /* visible imager width */ (the area where thumbnails are displayed), and /* overall container width . thumbnail container */ value (1700px) which is the container for all the images you added.
Step 6. To save the changes, click on the "Save form" button.
Step 7. Finally, go to "Layout" and click on the "Add Widget" link. When the window opens, select "HTML/Javascript" and paste the HTML structure of the carousel into the empty field:
Step 8: Once you've added the photos to your library, click the save button to save the widget and make it visible on your blog.
If you want to add more images or remove some, also change the width of the thumbnails, otherwise some images will appear after others.
To add multiple images, first paste the following code
Red Marks: How to add a Scriptaculous image slider to Blogger
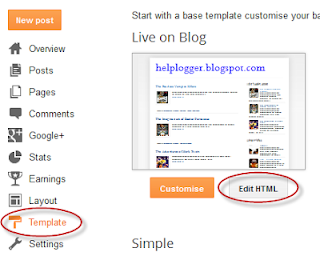
Step 1: Login to your Blogger dashboard and select your blog, then go to Template and click the Edit HTML button:Step 2: Click anywhere in the code area and press CTRL + F. A search box will open: type the tag below and press ENTER to find it:
Step 3. Just click add these scripts:
Please note. If you already have Scriptaculous and Prototype, you don't need to add the code highlighted in red, but note that it may not work with some versions of jQuery.
Step 4. Then find the following tag (see screenshot below for details):
]]>
 |
| Screenshot |
.carousel {
position: relative;
equally clear;
margins: 10px-20px by 20px;
border: 2px fixed #000; /* carousel border */
background-color: #333333; /* background color */
}
.carousel .navButton { cursor: cursor; the offer is blocked;
text indent: -9999px;
wallpaper repeat: no;
z-index: 10;
}
.carousel .container {
Position: absolute.
hide the excess;
}
.carousel .item {
Position: absolute. }
# cycle 2{
height: 88px; /* container height */
width: 100%; /* make the container */
}
# Carousel2 .container {
top: 12px;
width: 100%; /* Show container for visual images */
height: 100px; /* height of container for images */
}
# Carousel2 .items { top: 0; left: 2px;
width: 1700px; /* total width of all images */
}
# Carousel2 .item { height: 70px; width: 70px; drift - to the left; clear: true; }
# Carousel2 .item .icon img {location: dynamic; left: 0px; Width: 65px! Important; height: 65px; pointer: pointer;}
# Carousel2 .navButton { position: absolute; bottom : 0px ; width: 24px; height: 87px; }
# Carousel2 .navButton.previous { left: 0px; Background Image: URL ( http://3.bp.blogspot.com/-F5Qs-PaavL8/UoJNRUBO88I/AAAAAAAAAAet0/RYwSNdin6vc/s1600/button-left.png ); }
# Carousel2 .navButton.next { right: 2px; Background Image: URL ( http://2.bp.blogspot.com/-kOga7w7W0CA/UoJNRVJjaHI/AAAAAAAAet4/GI7YgzSjl0o/s1600/button-right.png ); }
# Carousel2 .item .key { display: none; }
# Carousel2 .item .picture { display: none; }
Please note:
Check out the comments highlighted in green to see which parts you can customize, such as the border color and background color in the carousel. Note that shares are images, so if you want to change them, you'll need to replace the two blue URLs with your own images.
If you want to change the size of the container, change the /* container width */ (carousel width), /* visible imager width */ (the area where thumbnails are displayed), and /* overall container width . thumbnail container */ value (1700px) which is the container for all the images you added.
Step 6. To save the changes, click on the "Save form" button.
Step 7. Finally, go to "Layout" and click on the "Add Widget" link. When the window opens, select "HTML/Javascript" and paste the HTML structure of the carousel into the empty field:
Please note. Replace the blue text with links and image URLs. The link URL is optional, so you can only add it if you want to link images to multiple posts.
Step 8: Once you've added the photos to your library, click the save button to save the widget and make it visible on your blog.
If you want to add more images or remove some, also change the width of the thumbnails, otherwise some images will appear after others.
To add multiple images, first paste the following code
Post a Comment for "Scriptaculous image slider/carousel for Blogger"